


Retro-fit your entertainment smart home with Plex
You’ve probably got quite a few screens at home — and the number could well be growing over time — which poses the problem of how to get movies and TV shows up on all these different displays.
Netflix is fine, if what you want to watch is on Netflix, but you might have your own videos you need to stream around the house. If that’s the case, Plex is the best tool for the job.
Plex helps you build your own personal Netflix library and then stream it to any screen in any room — it can even beam video to other computers and mobile devices anywhere in the world. We’re going to focus on video here, but you can use it to serve up music, photos and other content too.
Here’s how to get started.
Get your media in order
Before you start, it’s a good idea to have at least a handful of movies or TV shows that Plex can work with — you can easily add more later, but it’ll get you up and running. As we’ve said, video files in pretty much any popular format will work with Plex.
Plex can try and organise libraries based on metadata, but its job is much easier if you put everything in folders, like “Movies” and “TV Shows” for example. Keep individual shows and seasons in separate folders too, to make it easier for Plex to work out what’s what.
You can also help Plex by naming movie files in the “name (year).mp4” format — so a file for Avatar would be “Avatar (2009).mp4”, for instance.
Don’t worry about getting your whole collection in order: test out Plex with a few files first so you can see how it works and get an idea of how your media is going to look.
Install the Plex server
Don’t be put off by the term “server”, which might sound a bit technical and complicated: it’s just an app to “serve up” the content you’ve collected. The Plex setup process takes care of everything for you, so you just need to click through some screens.
1. Sign up for a free Plex account. This just identifies you inside apps and devices, and you don’t need to pay anything to get at the basic video streaming functionality (we’ll explain Plex’s premium plans later).
2. Download the Plex server app. The server app is available for Windows, macOS and Linux. You can even get it up and running on a NAS drive, though it needs to be a model that supports Plex (many of them do).
3. Run the installation wizard. Most of it is self-explanatory, but along the way the app will ask you to sign in with your account credentials and point the program towards the folders where your media is saved. You’ll then need to give it a name (like “Mac computer”) so you can identify it later.
Build up your library
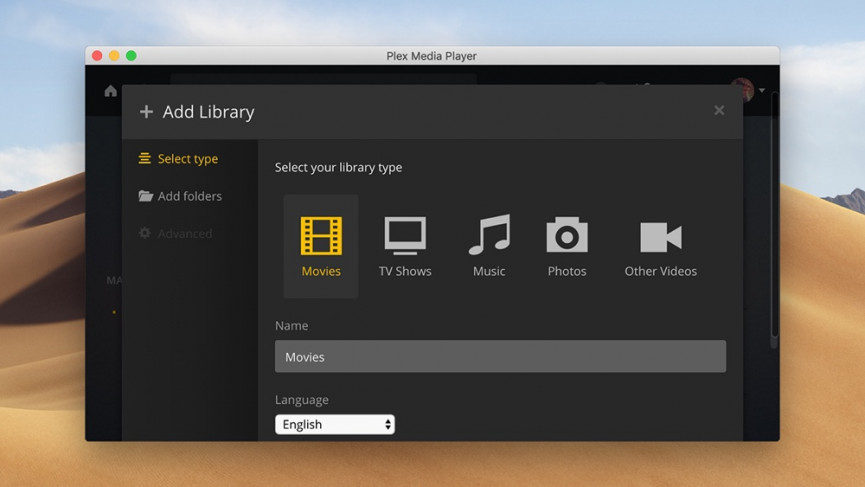
Next, you need to point Plex towards the videos (and music and photos) you want it to stream to your various devices. Plex supports a whole host of formats — there’s a full list here — so as long as you’re using file types that are fairly common, you should be okay.
1. Add content. This is as easy as copying new files into the folders that Plex is already watching out for, but remember to use the same naming conventions that we’ve already talked about, and an appropriate folder structure.
2. Update the Plex library. Plex servers are actually managed via a web interface — you can log in here. Click the three dots to the right of the Libraries entry on the left and choose Scan Library Files to add the new material.
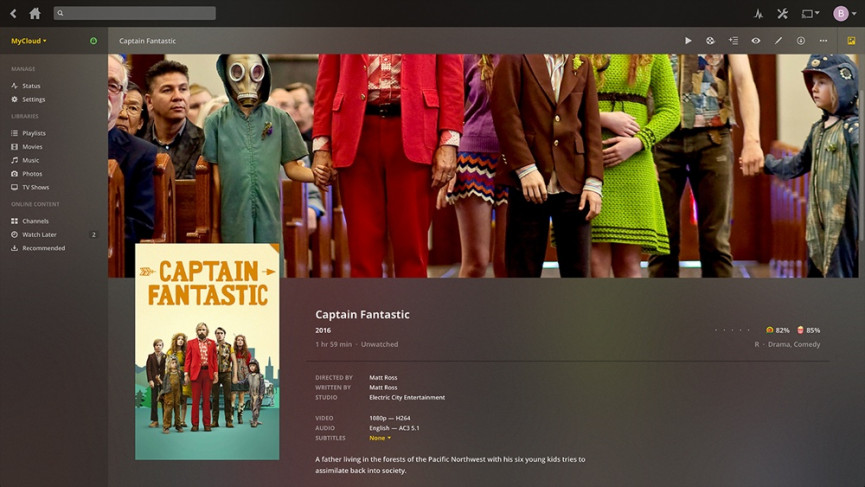
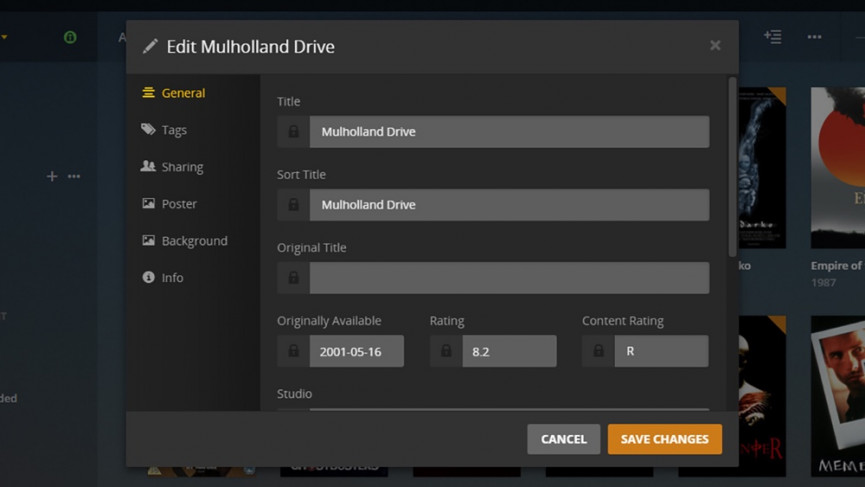
3. Check metadata. Make sure movies and TV shows are correctly labelled. Plex can pull information from the web, but to make changes, click on the small pencil icon that appears when you hover over any thumbnail.
Run the Plex apps
You can run any content right from the web or from the Windows or macOS apps you’ve already installed. You’ll note that Plex keeps track of what you’re watching and where you’re up to in each film and episode, and will even offer to automatically play the next episode when one has finished — just like Netflix.
1. Install Plex on your smart devices. You’ll find Plex apps for Android TV, Apple TV, PlayStation, Xbox, Roku, Amazon Fire TV and many more devices. Sign in with your Plex credentials and you’re up and running.
2. Browse your library. Once you’ve signed in, the server you’ve created appears (assuming you’ve left the computer in question switched on and connected to the web). There’s nothing else to configure or set up.
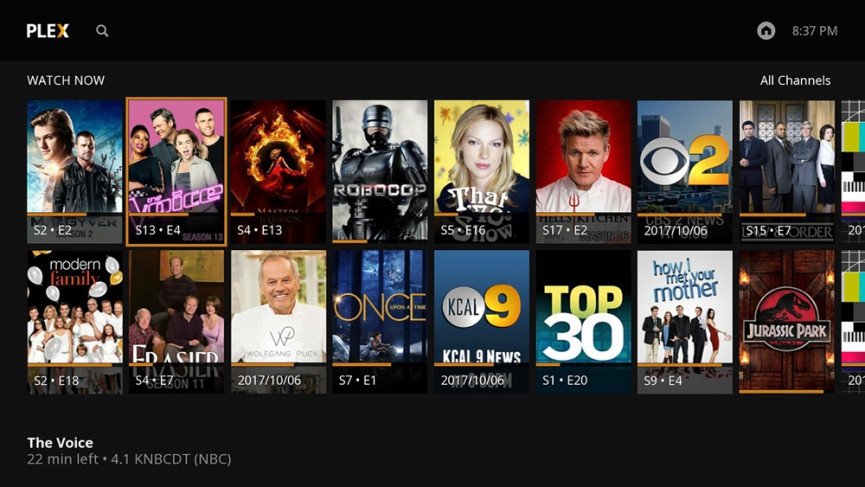
3. Start streaming. You can watch multiple show and films on multiple devices and Plex keeps track of where you’re up to at all times. The top section in the app, Continue watching, shows content you’re in the middle of.
Going further with Plex

You don’t have to limit yourself to streaming at home. As long as your server machine is left switched on, and you have the upload and download speeds to support it, you can stream videos and shows to computers and mobile devices over the web from wherever you happen to be.
As we alluded to above, there is a Plex Pass premium option, yours for £3.99/$4.99 a month, £31.99 a year, or £94.99 for a lifetime subscription. One of the extra features you get is the ability to watch and record TV over-the-air with an antenna and tuner connected to one of your computers.
When it comes to the mobile apps for Android and iOS, you can not only stream videos to these devices (which you can do for free), but also sync them for offline access. If you’re heading on a long trip, you can get a few movies queued up in advance.
One other useful feature you get with a Plex Pass is Plex Cloud: you can put all your content in a service like Dropbox or Google Drive and get at it from anywhere (so you don’t have to leave your server computer on at home).


