


The smart way to bring HomeKit support to everything from Nest to Sonos
As good as Apple HomeKit is, delivering both voice control and some powerful automation, the system is rather limited when it comes to hardware support. For example, you won’t find any Nest or Ring support for the platform, and there’s limited compatibility for other big brands such as Arlo, Sonos and a whole lot more.
That’s where Homebridge comes in.
Able to run on practically any computer, Homebridge is, as the name suggests, a bridge between HomeKit and other smart home devices. A lightweight NodeJS server that emulates the iOS HomeKit API, Homebridge is open-source software that provides the support that’s lacking from the platform. It is not in anyway affiliated with Apple, and as with all open-source software, install it at your own risk.
It can be a touch fiddly to install and run, but here we’ll take you through the initial installation. We’ll show you how to configure the system and how to add devices and get you up and running.
Which computer should I run Homebridge on?
Homebridge works with Windows, macOS, Linux and the Raspberry Pi. The most important thing is that whatever device you install it on, it needs to be turned on all of the time to work. For that reason, it makes sense to install it on a Raspberry Pi, as the small computer needs little power to run.
It’s worth reading the Raspberry Pi installation instructions on the Homebridge Wiki to get the initial required components installed, before returning to the Homebridge GitHub page for Homebridge installation instructions.
If you don’t have a Raspberry Pi, and just want to try out the system on a different type of computer, first you should download and install the latest version of Node.js, which is available for Windows, Mac, and Linux.
When you first run your Raspberry Pi it will run an outdated version of Node.js and the NPM package manager. You’ll need to update both to install and run Homebridge.
First, you need to type these two commands to update the package list.
sudo apt update
sudo apt full-upgrade
Next, we need to tell the Pi to get the latest version of Node.js, which we do by adding the current repository with this command:
curl -sL https://deb.nodesource.com/setup_15.x | sudo -E bash -
Then, you’re ready to update to your new packages, so type the following commands (type Y when prompted):
sudo apt install nodejs
sudo apt install npm
Once installed, follow the steps on the Homebridge GitHub page to download and install Homebridge. You should use the following command line from a terminal window when installing:
npm install -g --unsafe-perm homebridge
sudo npm install -g --unsafe-perm homebridge
Once completed, you’re ready and Homebridge is installed on your computer. You can run it by using the command prompt and by typing “homebridge”.
You’ll see a QR code on the screen, along with a message that tells you that there’s no config.json file and that you don’t have any plugins. For now, quit Homebridge by going to its Terminal window and press CTRL+C (Apple+C on a Mac).

There’s now a web interface that makes it easier to manage Homebridge. To install this, get up command prompt and type:
sudo npm install -g --unsafe-perm homebridge homebridge-config-ui-x
Next, we want to install Homebridge as a service so that it starts when your computer boots up. You can do this with this command:
sudo hb-service install --user homebridge
Once done, you can see on screen your computer’s IP address, and the address of the web server management portal. It’s worth giving your Homebridge computer a fixed IP address, which is easiest if you use your router’s DHCP reservation feature.
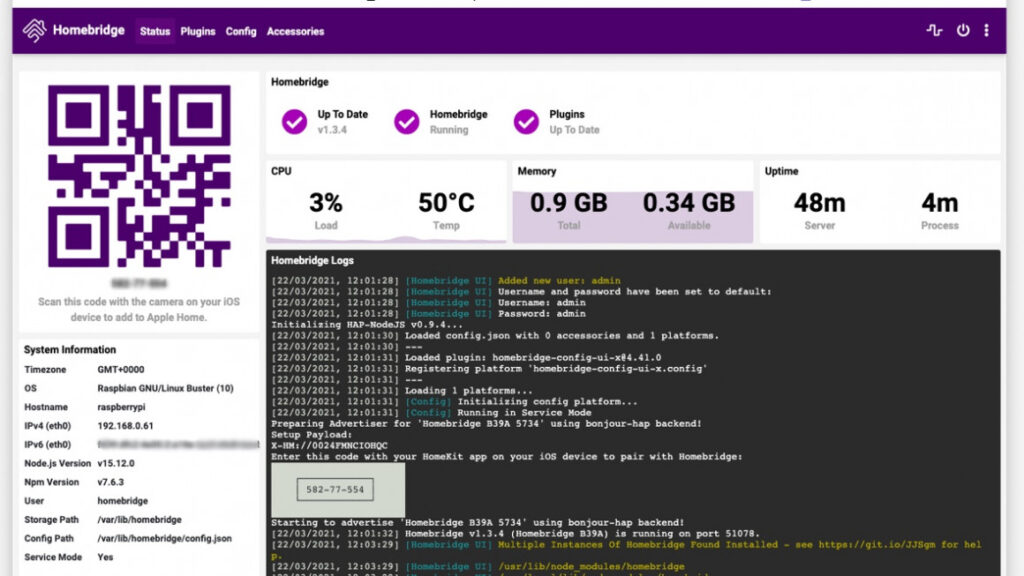
Thake the full address of your Homebridge server and paste that into a browser (it will be something like, http://192.168.0.61:8581). The default username and password are both ‘admin’.
When you log in, you’ll see all of the information about your server, including the QR code to add it to Apple Home.
Installing plugins and configure Homebridge
When you use the installation method above, Homebridge will install with a default configuration file, so you no longer need to create one. And, using the web interface updates the Config file automatically, so you no longer need to edit it by hand. Still, it’s handy to know what should be in the file, just in case. What follows is how to manually set up the server, but you can skip down to the Adding Homebridge plugins section below for the easy route. As well as the instructions below, you can find the Config file in the web interface, by clicking Config.
With Brackets, you can create a new file from the File > New menu. Go to Save, and then you need to give the file the right name and put it in the right directory.
For Windows, you need to type the following directory name into the save dialog box:
c:users\.homebridge.
For Mac users, in the save dialog box press Apple+Shift+G, then type:
~/.homebridge.
For both, enter the name of the file as config.json.
With Brackets, your config.json file is always available when you open the application, so for future updates you can select the file, enter the text that you need, and click Save.
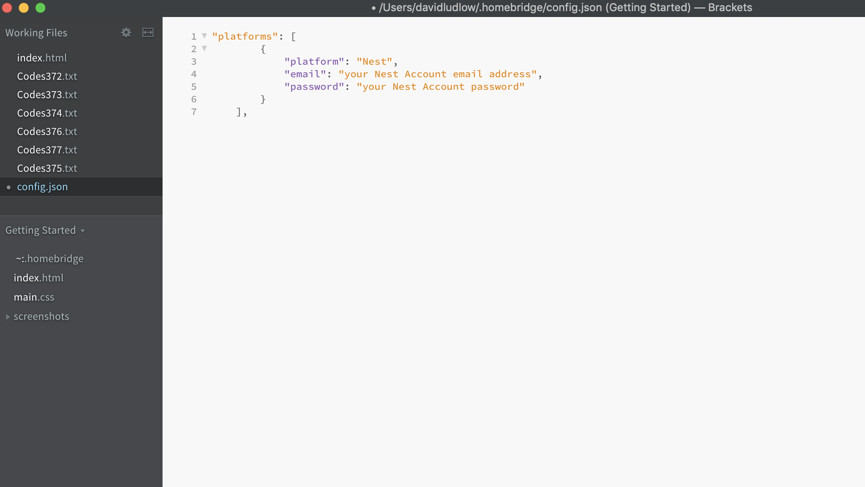
You can now start to add the information that you need. First, you need a basic configuration, such as this one:
{
  "bridge": {
    "name": "Homebridge",
    "username": "CC:22:3D:E3:CE:30",
    "port": 51826,
    "pin": "031-45-154"
  },
  "description": "My Homebridge server.",
  "ports": {
    "start": 52100,
    "end": 52150,
    "comment": "This section is used to control the range of ports that separate accessories should bind to."
  }
}
You can change the username and pin, but you must keep the formatting and length the same.
Adding Homebridge plugins
From the web interface, you can manage your Homebridge plugins, which give you control over devices that don’t normally have Homebridge support.
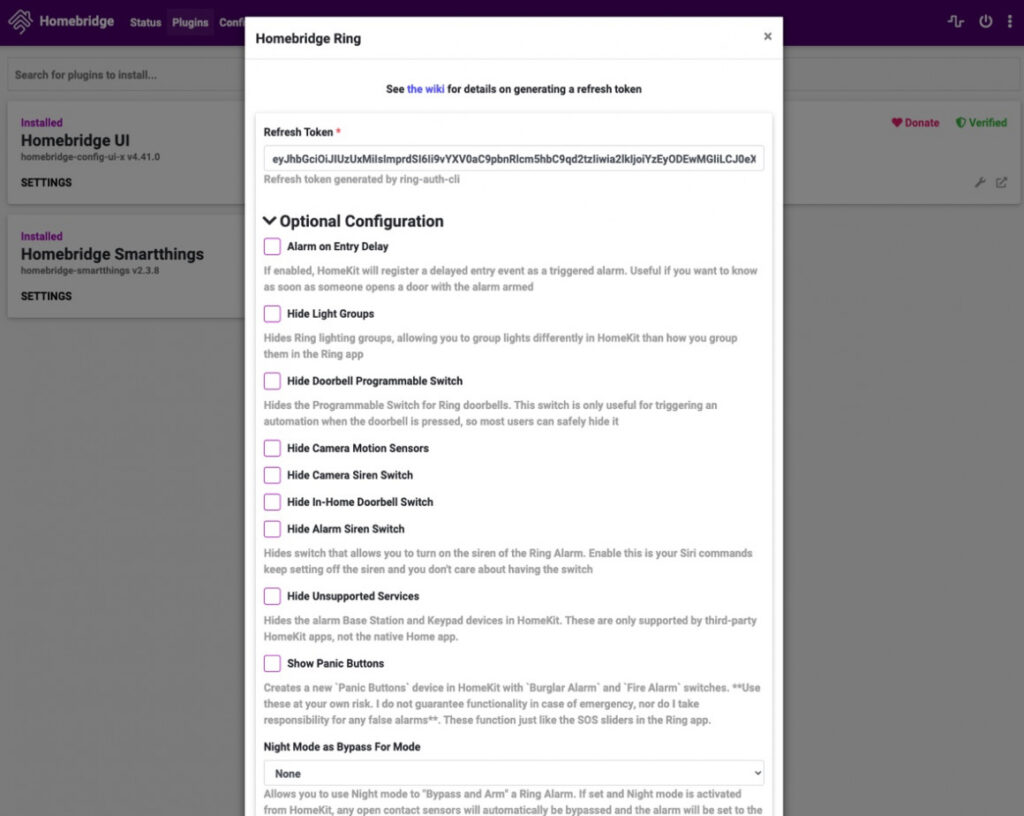
To add a new plugin, click Plugins and search for the one you want. You’ll often get multiple choices, but pick the one that says ‘Verified’ and click the Install link.

You’ll get a pop-up window that shows you the progress of the installation. When a plug-in completes, you’ll get a new window with configuration options. In many cases, as with Ring, all you need to do is log into your account and supported devices are seen.
Once linked, you can click on the Settings button to view options and the Optional Configuration. With Ring, for example, Doorbells can appear as buttons that can trigger events; this probably isn’t very useful, so you can just hide them from view.
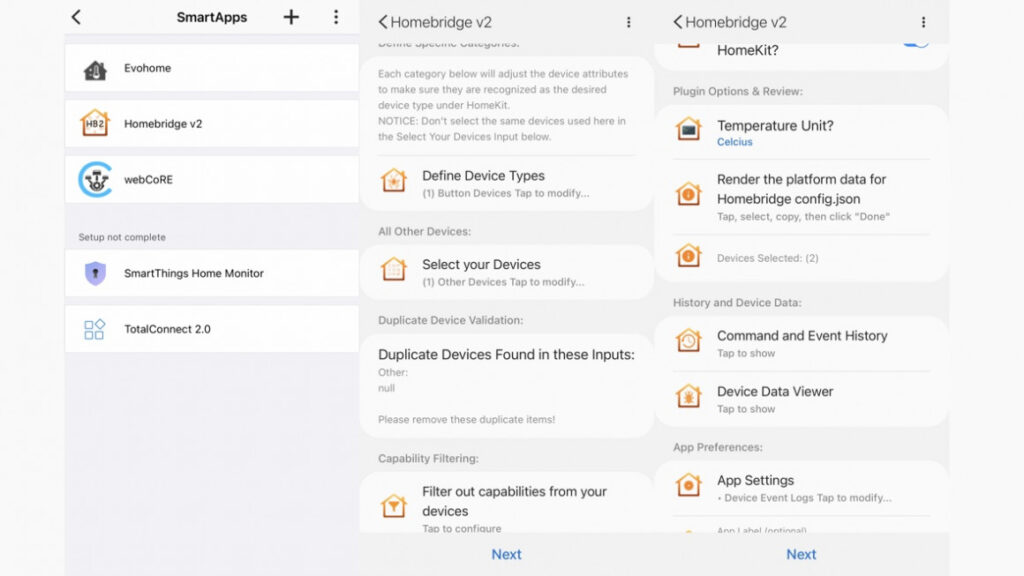
Some plugins are more complicated to configure and require extra steps, such as SmartThings. After installing this plugin, you’ll see a long list of required fields that you need to enter, but very little help.
If you get anything confusing, it’s worth checking the official Homebridge website for Plugin installation instructions: search for the Plugin you want and then read the instructions.
SmartThings, for example, requires some work to be done in SmartThings itself, as the Homebridge SmartThings installation instructions explain.
In this case, ignore the instructions on using the SmartThings Classic app (this has been discontinued), but use the new SmartThings app, and you’ll find the Homebridge app under Smart Apps: you need to select which devices will be available to HomeKit by following the on-screen instructions, and you’ll find the details you need to configure the Plugin under the Render the platform data option.
Verdict: Aeotec SmartThings Hub review
This gives you a configuration file that you can copy and paste into the Homebridge configuration file. However, you can just copy and paste the information out of this file straight into the fields on the Plugins page in the Homebridge web interface.
You can continue to add plug-ins in the same way, building up all of your connected devices.
Adding Homebridge to your phone
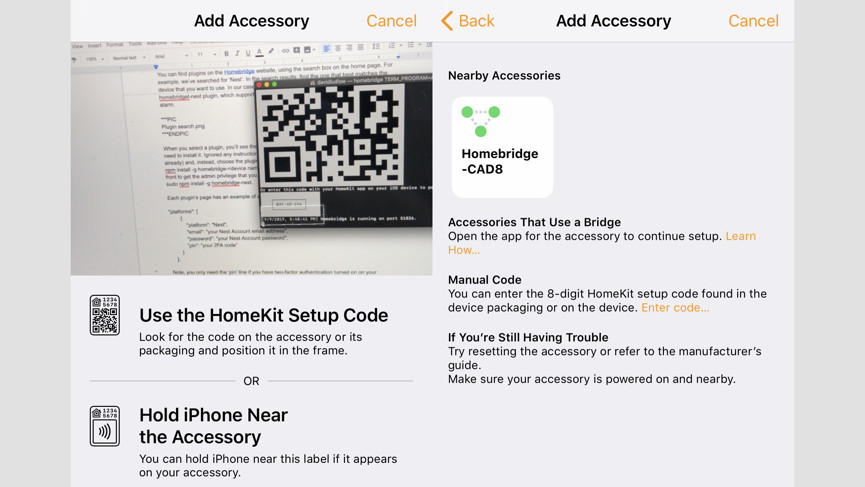
With your configuration working, open up the Home app on your iOS device. Then select ‘+’ and select Add accessory. Tap Don’t have a Code or Can’t Scan, then select your Homebridge computer on the next page.
You’ll be told that this is an Uncertified Accessory, but select Add Anyway. Manually enter the HomeKit setup code (the main PIN in your configuration file). Now, your Homebridge devices will be found and added to Home, but don’t be surprised if there are more than you think.
For example, with Nest Thermostats, you get a switch that turns Eco mode on or off, the main thermostat control, and a switch that sets if you’re at home or not.
All of the devices you add will appear while your Homebridge server is running.
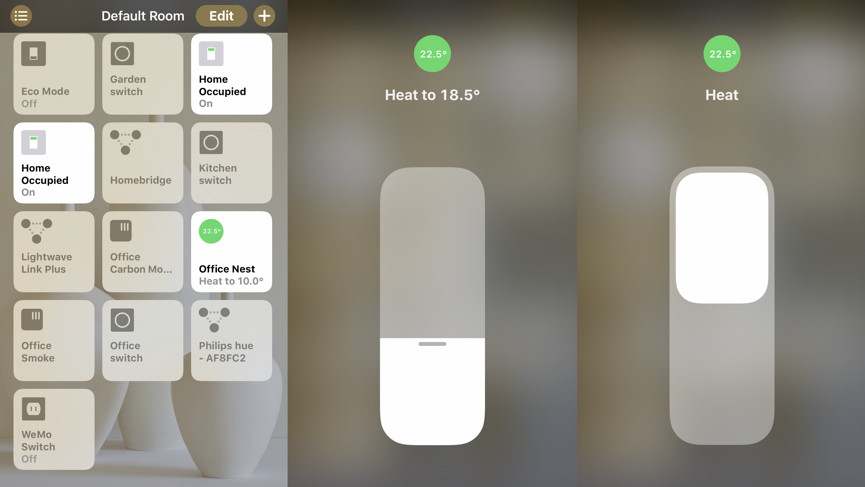
Once your devices are in HomeKit, they’ll appear by default in the room where you added the hub. You can move devices into any room and control them just like any other HomeKit device.
You can also use them in HomeKit Automations and Scenes, mixing and matching with native HomeKit devices.


