How to get the most out of your Apple TV, 4K and more
Apple TV might have started out as a hobby for its Cupertino-based creator, but it was also the tech giant’s first foray into the world of the smart home. Over the past couple of years, Apple has started to take its streaming box even more seriously.
And now, the Apple TV is one of the best streaming kits you can buy. It ticks all the boxes: Dolby Vision, 4K, Dolby Atmos and even an app store.
The latest Apple TV 4K, launched in 2021, even packs in a Thread radio, making it an even better HomeKit Hub and it’s all set to play a big part in the Matter smart home platform as a Thread border router.
And sure, you might know how to work it, but there are a number of secret manoeuvres and settings that you may not have known about.
We’ve grouped them together for you here, to help upgrade you from an Apple TV user to an Apple TV savant.
Change the Home button’s action
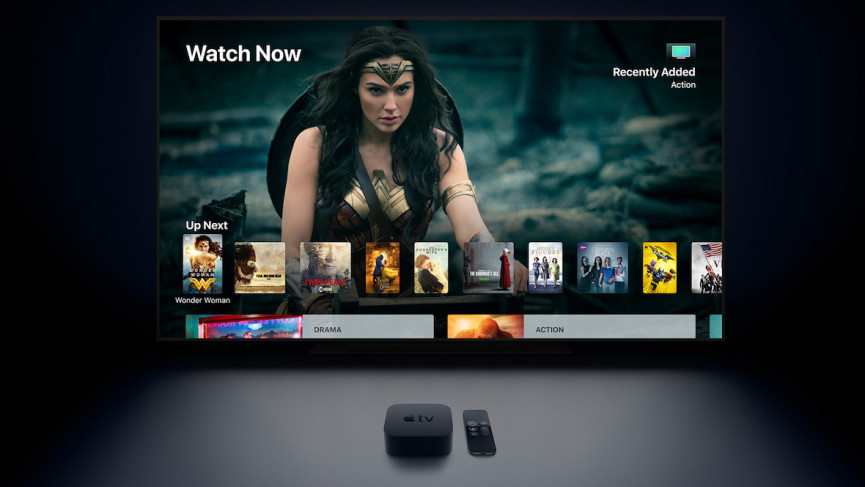
Apple’s TV app is your movie and TV hub. It keeps track of where you are in your favourite TV show and it’ll show you whether that movie you want to watch is included in your subscriptions, or if you’ll have to pay for it. It also keeps tracks of your local sports teams.
When you click the Home button on your Siri Remote, you’ll go straight to the TV app. That’s cool, but unfortunately the TV app isn’t where it needs to be yet (please add Netflix support, thanks). Until that moment comes, you’re better off changing the function of the Home button.
1. Head to Settings.
2. Click Remotes and Devices.
3. Click Home Button to switch to the Home Screen.
Now when you click the Home button you’ll actually get to, you know, go home. If you’re big on Netflix, this is a much easier way to get to all your content as, unfortunately, the TV app doesn’t have support for Netflix content yet.
How to connect your PlayStation DualShock 4 controller to Apple TV
1. Turn on your Apple TV and go to Settings.
2. Go to Remotes and Devices.
3. Go to Bluetooth.
4. On the PlayStation controller, hold down the PlayStation and the Share buttons until the light on the black of the controller starts blinking.
5. You should see the controller appear under the devices listed. Select it with the Apple TV remote and they’ll pair.
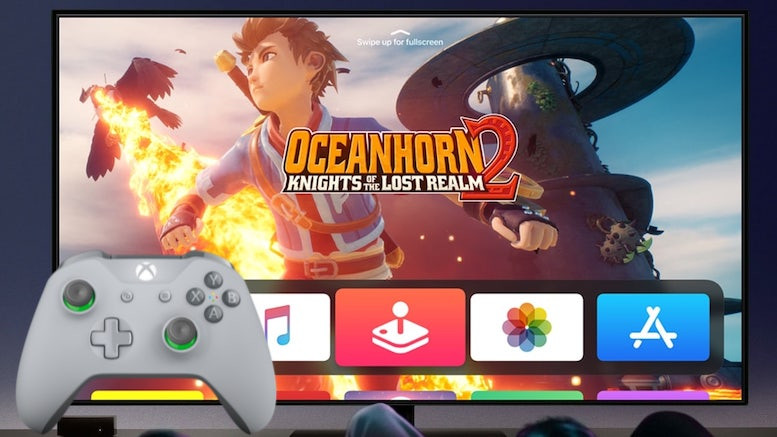
How to connect your Xbox controller to Apple TV
If you’re using an Xbox controller the process is much the same, but only some Xbox One controllers are compatible. You’ll need one of the controllers with the model number 1708, which come with the Xbox One S, or the Elite 2 controller that comes with the Xbox One X.
You can find your controller model number in the battery compartment on the back of the controller, so pop them out and take a look. If you bought your Xbox One console in the last couple of years, or have upgraded your controller, there’s a high chance you don’t need to worry.
You also want to first make sure your Xbox One controller firmware is up to date. Then do the following.
1. Turn on your Apple TV and go to Settings.
2. Go to Remotes and Devices.
3. Go to Bluetooth.
4. Turn on the Xbox controller, then press and hold the Connect button for a few seconds.
5. You should see the controller appear under the devices listed. Select it with the Apple TV remote and they’ll pair.
If you’ve got the a new Xbox Series next-gen console then you’re out of luck, for now… a line on the Apple TV support page reads:
“Microsoft and Apple are working together to bring compatibility for the Xbox Series X controller to customers in a future update.”
Make use of Dark/Automatic modes
The Apple TV’s interface is light and breezy, but it doesn’t have to be that way. There’s also a dark mode you can switch to. Dark mode can be pretty wonderful, letting some content, like photos, stand out.
However, there’s a third option called Automatic. If you switch to it, light mode will be in effect during the day and dark mode will activate when it’s night. This way, you get the best of both worlds. In the daytime, your Apple TV interface will be bright and fun and then, at night, it’ll get dark and help you get into the mood for that 100th episode of House.
1. Head to Settings.
2. Go to General.
3. Click Appearance.
4. Choose Automatic or Dark.
Reduce those terribly loud sounds
Movies are still made to be played in cinemas, which tend to have state-of-the-art sound systems. Dialogue is crisp and clear, and then explosions and surprises are full, rich and loud.
Unfortunately, that doesn’t translate as well when you’re at home and watching late at night. If you’ve ever turned up the volume to hear low dialogue only to give yourself a heart attack when an explosion comes around, Reduce Loud Sounds is the Apple TV feature for you.
1. Hit up Settings.
2. Go to Video and Audio.
3. Click Reduce Loud Sounds.
The music and sound effects of whatever you’re watching will come in softer, yet keep all the detail of the original. The best part? You won’t be frantically lowering the volume hoping the neighbours didn’t hear.
Quick switch between apps
The Apple TV has apps now, and sometimes that means you’ll be multitasking. Maybe you’re switching between Netflix, HBO Now and Amazon Prime Video to pick out something to watch. Instead of perusing an app, going to the Home Screen and then jumping into another app, there’s a simpler way.
Just double tap the Home button on the Siri Remote. You’ll be greeted to a carousel of your most recently used apps, and you can quickly jump into whichever app you need.
Cable subscriber? Use Zero-sign on
Apple TV has had a feature called Single-sign on, letting cable subscribers sign in once and get access to all of the video apps available through their subscription. In tvOS12 it gets even better with Zero-sign on, which detects your broadband networks and does all the signing in automatically. There is still a bit of a setup process here though.
1. Open Settings.
2. Select Accounts.
3. Scroll down to TV Provider and sign in by selecting your cable provider.
At the time of writing only Charter is making use of Zero-sign on – you can download its Spectrum app right now if you’re a subscriber. Just note that you’ll need a fourth-gen Apple TV or an Apple TV 4K to get it.
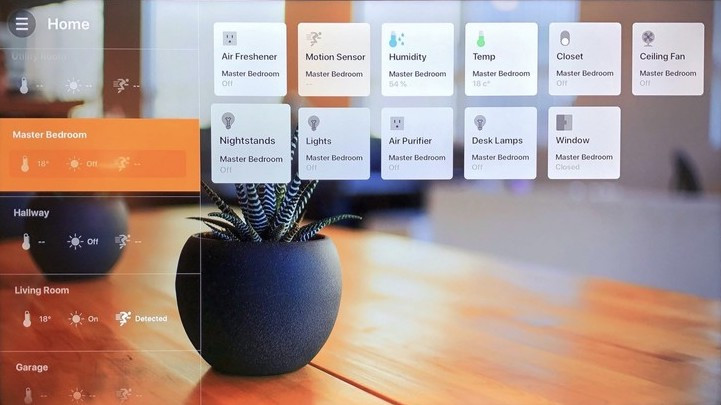
Use the Apple TV to control your smart home
The Apple TV can be your smart home hub for controlling all your HomeKit gadgets. If you haven’t done so already, you’ll need to link your account. To do so, you’ll need to do the following:
1. Open Settings.
2. Select Accounts.
3. Select iCloud and log in with your account.
Now, there’s no Home app on the Apple TV, but you can use Siri to control devices that are already connected to your account. There’s a mic in the remote, so you’ll just need to hold the microphone button and speak your command. If you want to add more smart home devices, you’ll need to do this in the Home app on your iPhone or iPad.
Talk to Siri
Speaking of Siri, you can chat to Apple’s personal assistant while in the middle of a movie and not have it interrupt. For example, you could ask Siri for a sports score and the results should pop up in a panel on the bottom of the screen.
Read this: Best Siri commands for Apple TV
If you then select that panel the current programming will pause, but otherwise you can just swipe down on the remote to dismiss it. Be warned: Siri does interrupt your video in YouTube.
Use the keyboard shortcuts
The most baffling UI decision on the Apple TV is its keyboard, which opts for a line of letters and numbers. This can make typing anything into the Apple TV take forever, but there are a couple of tricks to make things easier.
While you’re typing, press the Play/Pause button to instantly cycle between upper and lower case letters. This will save you having to use the touch pad to scroll down to the shift button, and will let you keep typing.
Similarly, if you press and hold the touchpad on a letter, you’ll be presented with alternate characters (like ć or ç for the letter c). On the left, you’ll also see a quick backspace button, and a quick swipe to the left will delete your last character. Hooray.
Restart your Apple TV – quickly
Sometimes your Apple TV is going to give you some trouble. Maybe an app won’t respond. Or your connection is being bad. Time for a restart.
You can do this by heading into the Settings menu and scrolling all the way down to System and then Restart. But there’s a simpler way, and all you have to do is hold down the Home and Menu buttons on the Siri Remote for six seconds. Once you do that, your Apple TV will reboot.
Make and manage some Folders
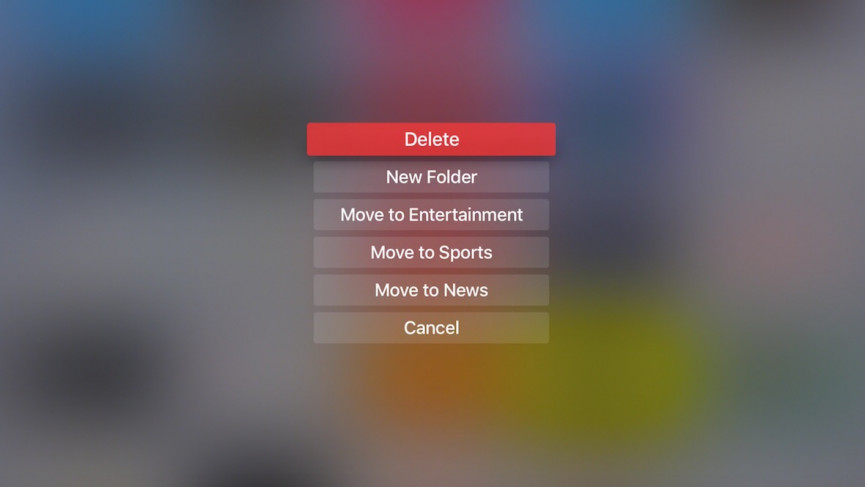
You may already know that if you select an app icon and then click and hold the touchpad you can move the app around the home screen. If you move an app over another app, you can create a folder, much like you can on iOS.
There’s an easier way to do this though. Click and hold on an app icon to make it wiggle, and then press the Play/Pause button on the Siri Remote. You’ll bring up a secret menu that will let you delete the app or create a new folder.
If you already have a couple of folders, it will let you easily sort the selected app into the folder. It’s much, much easier than using the Siri Remote to drag and drop apps on top of each other.
Output your audio to HomePod
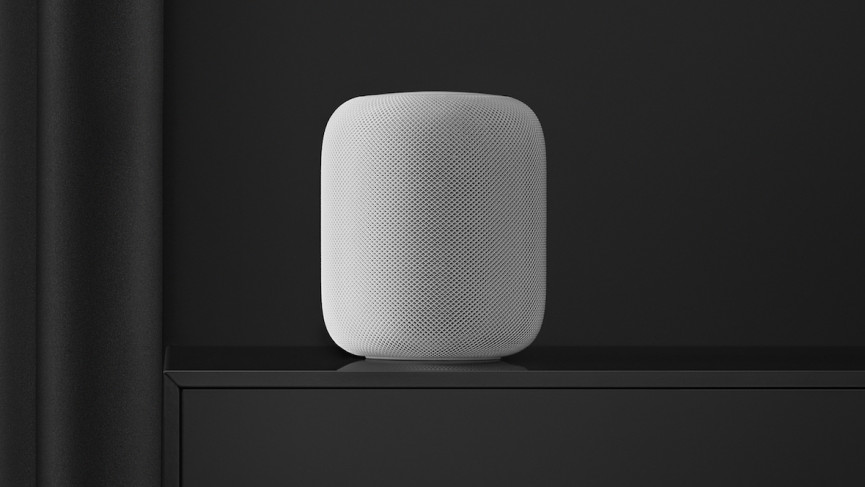
If you’ve got a HomePod and Apple TV, you may be wondering how you can take advantage of Apple’s great-sounding speaker to boost your home cinema game. I
t’s easy and, if you’ve got the original HomePod, then you can get Dolby Atmos too,
Add Apple TV remote to your iOS Control Center
You can use the Siri Remote to control the Apple TV if you want, but there’s also the Apple TV Remote app on iOS. However, if you don’t want to have to open up an app every time you want to use it, there’s also another way.
Control Center will give you access to all the remote features you need. Just swipe down and click the Apple TV icon in Control Center. You’ll be able to navigate, head to the menu, head to Home, play and pause and even use Siri. You won’t be able to adjust volume though.
Control Center’s TV remote is supposed to install itself when you download the Apple TV Remote app, but if it’s not there follow the steps below to activate it.
1. Open the Settings app.
2. Click Control Center.
3. Open Customize Controls.
4. Scroll down and click the green plus next to Apple TV Remote.
The Apple TV is one of the best-known streaming boxes out there, but for a long while the biggest criticism against it was its lack of 4K.
That ended with the Apple TV 4K, but this brings its own list of questions: What apps even support 4K? What’s the deal with Dolby? Is there enough 4K content out there to justify the upgrade?
Read this:The best Apple TV tips and tricks
That’s exactly what this guide is designed to help you with. We’ll walk you through what makes the 4K different from the regular Apple TV, how to set up and test 4K and HDR and what you can even watch on this thing.
4K, Dolby, HDR10 and more
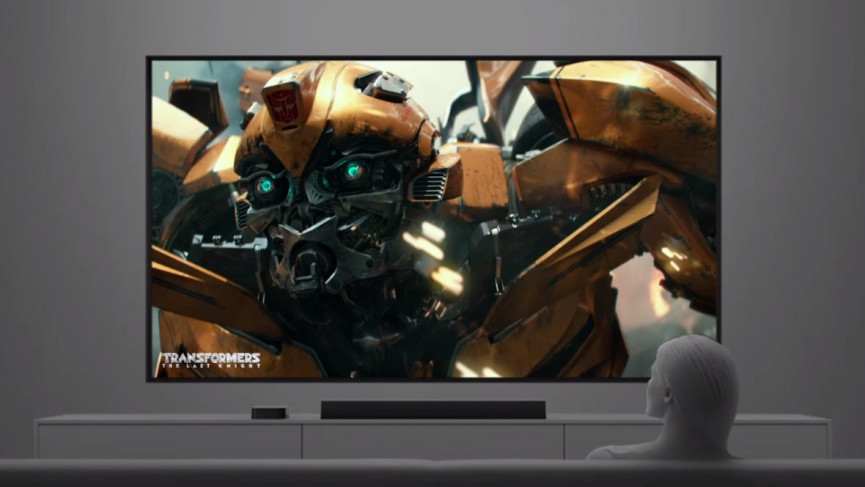
The Apple TV 4K is Cupertino’s premium streaming box. It sports an upgraded A10X processor that allows it to push out 4K movies and TV shows, as well as support for HDR10, Dolby Vision and Dolby Atmos. (Psst, it can also act as a hub for your HomeKit smart home.)
It is one of the most powerful streaming boxes you can get, and it’s powered by tvOS, Apple’s TV box operating system. The Apple TV 4K actually supports four versions of 4K: 4K with standard range, 4K with HDR10 and 4K with Dolby Vision HDR.
The difference between HDR10 and Dolby Vision is actually significant: HDR10 is static, which means it applies the same tone to the entire TV show or movie. Dolby Vision can change the tone with every scene or shot, which makes it a more dynamic and, frankly, better technology.
HDR10+ fixes that static issue with HDR10, but it’s pushed by Samsung and is only supported by Amazon Prime Video at this point. It’s not supported on Apple TV 4K either. Regardless, while Dolby Vision is the ideal, these days most new 4K TVs support HDR10.
The other thing you should know about is refresh rates. By default, the Apple TV 4K will display your content with the highest available refresh rate. For example, if your TV supports 4K Dolby Vision at 30Hz, but also supports HDR10 at 60Hz, it’ll choose HDR10 because it has a higher refresh rate.
This can be good if you want the highest refresh rate, but if you want your content to display in the form the creators intended, you’ll have to tweak some settings, which we’ll get into in a bit.
How to set up 4K and HDR on Apple TV
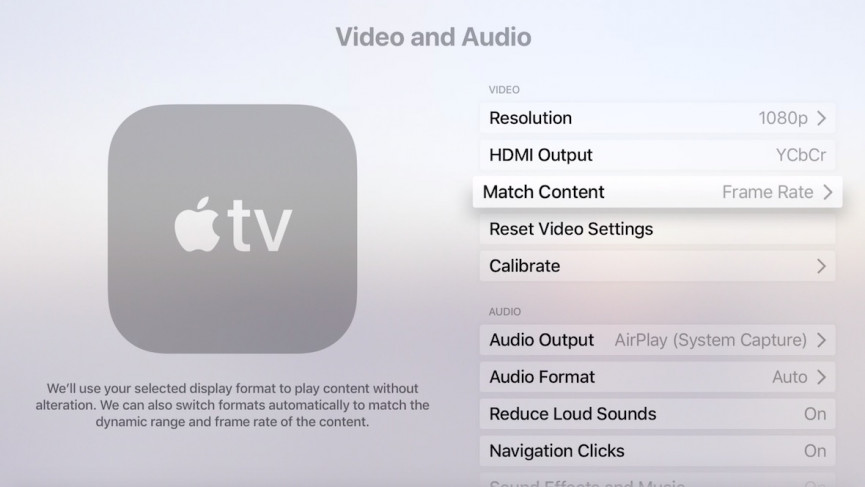
For the most part, the Apple TV 4K will automatically show things in 4K when you’ve got a supported TV, supported content and supported app. But there are things you can do to improve the experience.
The first thing is to understand what your TV supports. Time to dust off that old TV manual and check what it can do (or do a quick Google). The second thing is to turn on the Apple TV’s Match Dynamic Range feature, which will prioritise using the HDR mode and refresh rate that best matches the TV show or movie you’re watching – rather than the highest standard your TV matches.
To do this, follow these steps.
1) On your Apple TV 4K, go to Settings.
2) Choose Video and Audio.
3) Choose Match Content.
4) Choose Match Dynamic Range and Match Frame Rate.
Match Dynamic Range will display Dolby Vision TV shows and movies with Dolby Vision support. Match Frame Rate will use the frame rate the movie or TV show was intended for. So, movies will typically show in 24 frames per second, rather than the more experimental 30 or 60 frames per second.
The other things to do all deal with hardware. You’ll want to make sure that you’ve got a good HDMI cable, because not all HDMI cables support HDR or 4K. Apple recommends getting one with Dolby Vision certification, as that is what the company used to test Apple TV 4K. That said, some HDMI cable manufacturers like to spout a lot of nonsense when it comes to 4K – check out our full HDMI guide to cut through the jargon.
Similarly, update the software on your TV. Manufacturers are often tweaking the picture and colour modes to make sure things are optimal. Plus, you’re getting rid of any potential support issues.
How to test 4K and HDR on Apple TV
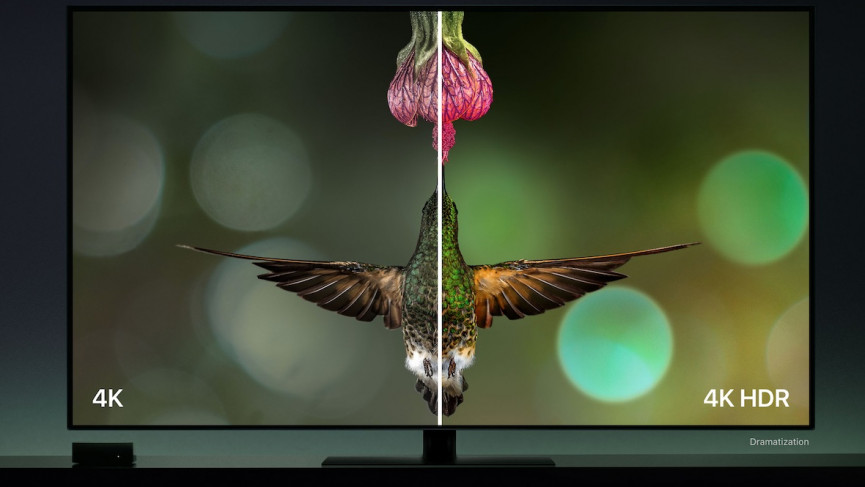
Apple is pretty good at making technology disappear into the background. It doesn’t want you to worry about standards and such. That’s great, but if you’re a big A/V nerd you’ll want to know whether you’re actually watching Aquaman in 4K or 1080p.
The easy way to do this is to swipe down on your Apple TV remote, which will tell you whether you’re streaming it in 4K. If you want to know whether you’re running in HDR or not, you’ll have to go back to that Match Content screen in Settings. When you select Match Dynamic Range, your TV picture should sputter a bit and change. If it does, you’re good to go.
If you’re still not convinced, you can pair your Apple TV to your Mac. To do that, go and download Apple’s Xcode developer tool and make sure your Mac and Apple TV are on the same Wi-Fi network. Then, do the following:
1) In Xcode, choose Window and then Devices and Simulators.
2) On Apple TV 4K, go to Settings then Remotes and Devices then Remote App and Devices.
3) In the Xcode device manager, select Apple TV.
4) Enter the six digit pin that appears on your Apple TV on your Mac.
5) On your Apple TV, go to Settings.
6) In Settings, go to the new Developer menu.
7) Turn on Playback HUD.
Now when you play a movie, a new developer HUD will pop up and tell you all the technical information about what you’re playing. You’ll see the resolution, whether it’s using HDR, which refresh rate it’s using, the frame rate and more.
What apps and shows are in 4K?
Most new movies, especially big blockbusters, are going to be in 4K. You can find these in a few places: Netflix, Amazon Prime Video, Vudu and the Movies Anywhere app.
You may not have heard of Vudu but it’s a pretty major one, because you’ll be able to watch Disney, Marvel, Pixar and Star Wars movies in 4K on it. See, Disney won’t let Apple host 4K Disney movies in the iTunes store – or most other people, for that matter. The reason Vudu gets a pass is because it’s a significant part of Movies Anywhere, the digital movie locker Disney is pushing.
Netflix has 4K if you’ve got a $15.99 Ultra HD plan, and its 4K series and movie offering is getting better. The biggest source of 4K stuff is going to be the iTunes store though.
Even better, it’s got easy labels to let you know whether it’s 4K, Dolby Vision, Dolby Atmos or HDR10. Apple’s iTunes is one of the few places where you can get 4K, Dolby Vision and Dolby Atmos movies and TV shows. Plus, Apple will upgrade your old HD stuff to 4K Dolby Vision and Dolby Atmos for free if it’s available.
So if you bought the HD version of Creed a couple years ago, Apple will give you the 4K edition for no added cost. That means, if you own an Apple TV 4K, you’ve all of a sudden got 4K copies of whatever movies you have in your iTunes collection.
Finally, don’t forget Siri. Apple’s famous assistant can help you find 4K movies and TV shows. Try saying “Hey Siri, show me movies in 4K,” “Hey Siri, show me TV shows in HDR,” or“Hey Siri, show me movies in 4K and HDR.”
The Apple TV is one of our favorite streaming boxes, bringing a wide range of TV and movie services to an intuitive interface. We wish it had a better remote control, but that’s our only moan.
But like all tech, it’s vulnerable to failing every once and a while. The Apple TV doesn’t come with an off switch, but there are ways of restarting it and, if necessary, giving it a full factory reset.
Below we’ll walk you through the process of both. Also be sure to check out our full list of Apple TV tips and tricks.
How to factory reset the Apple TV
Ok, the quick restart hasn’t worked; time for more drastic measures. Or, perhaps, you want to pass your Apple TV onto someone else and need to wipe it first. Again, the process is a little different between models.
If you have an Apple TV 4K or Apple TV HD, here’s what to do:
1. Go to the home screen.
2. Go to Settings.
3. Tap System.
4. Tap Reset.
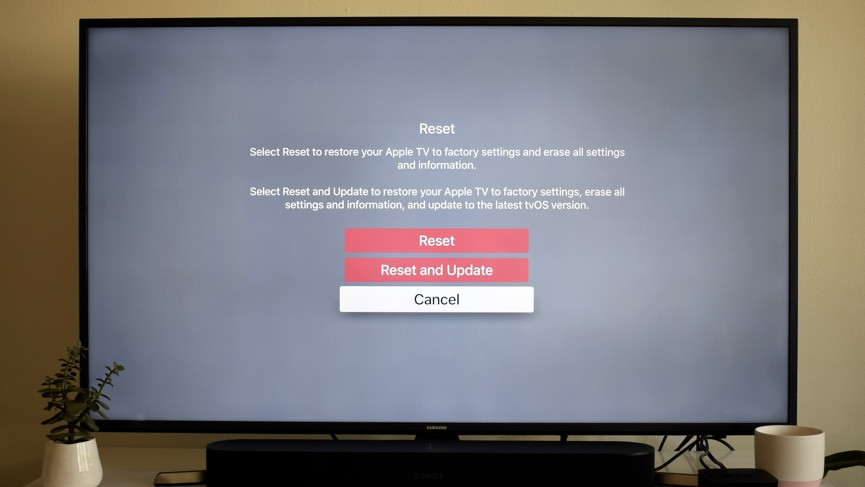
Here you’ll be given two options: Reset or Reset and Update. The first takes the Apple TV back to exactly how you bought it, while the latter will wipe everything but will then automatically update to the latest version of tvOS.
If you have an older Apple TV, the process is slightly different. Do this:
1. Go to the home screen.
2. Go to Settings.
3. Tap General.
4. Tap Reset.
The options you now see are Reset All Settings and Restore. They’re confusingly worded, but Reset All settings will wipe everything back to how the Apple TV was when you bought it; Restore will also erase everything but will update the software once it’s rebooted.
But in all cases, everything will be wiped out – all settings and stored information.
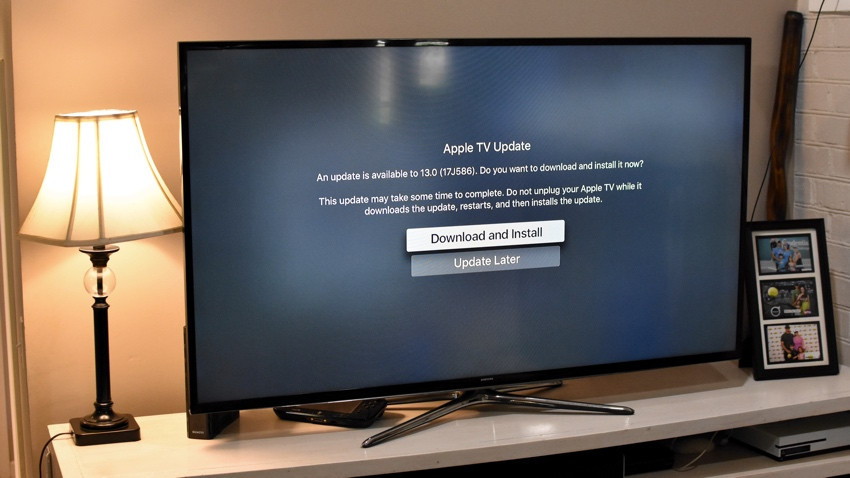
How to update Apple TV 4K and Apple TV HD
If you’re using one of the latest Apple TV devices, here’s how to update it.
1. Boot up the Apple TV and open the Settings app.
2. Go to System.
3. Select Software Updates.
4. Select Update Software.
5. If it discovers there’s an available update, select Download and Install. (Alternatively, you can select Update Later).
6. Let it download the update and allow the Apple TV to restart, before the update is installed. Don’t unplug it while it’s doing it.
To check the current software version running, go to Settings > General > About. You’ll also see the current version displayed on the left side of the screen in the Software Updates section.
How to turn on automatic updates on Apple TV
Both the Apple TV 4K and HD models allow for automatic updates. You might wonder why this isn’t the default, and there are various reasons. For example, Apple has been known to roll out buggy software updates, and so you might want to maintain a position where you can avoid those.
1. Open the Settings app.
2. Select System.
3. Select Software Updates.
4. Select Automatically Update.


