


Get your Arlo wireless cameras back up and running
One of the best things about owning an Arlo Pro wireless security camera is the rechargeable battery, which means you don’t have to fuss with wires when positioning your camera. But when the times comes, how do you recharge your Arlo camera?
Fear not, we’ll explain how to check the batter level, how to recharge your Arlo Pro, Arlo Pro 2 or Arlo Ultra cameras.
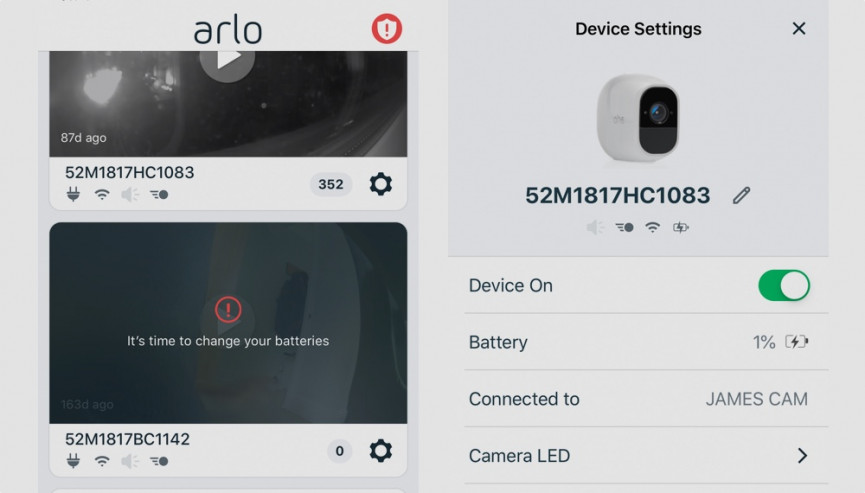
1. Check battery level
Go into the Arlo app and check your cameras. Any that need charging will have a message displayed on the screen. It’s always a good idea to name your cameras, so you know which one is running low. You can get a proper battery reading by going to the Settings for the individual camera (on the home screen) and look at the Battery column.
2. Insert battery into Arlo Pro
Now comes the easy bit. To charge your Arlo Pro camera you just need to have the battery installed inside the camera itself.
3. Pull down flap and insert micro USB
On the back of the Arlo Pro there’s a rubber bung that weatherproofs the charging port. Pull this to reveal the micro USB port. You’re also going to need to plug this into the AC outlet, and avoid USB hubs – which simply won’t have enough to charge the monster battery. If you got a newer Arlo Pro 2 or Arlo Ultra, the charger attaches using a magnetic connection, rather than micro USB, after a fault with the weatherproof bung.

4. Leave on charge
Getting a full charge takes around two hours, possibly longer. And don’t get hung up looking for a charging light. When you plug in the charger a blue light will flash on the front, but then won’t return until the battery is fully charged. You can check it’s charging from within the app.
5. Return to app to check level
When the camera is fully charged you’ll see the solid blue LED on the front of the camera – but more importantly you’ll be able to connect and see your feed. Job done.


