Stay up to date with SmartThings, whether you're a V1, V2 or V3 user
Rumours of the demise of Samsung SmartThings have been greatly exaggerated.
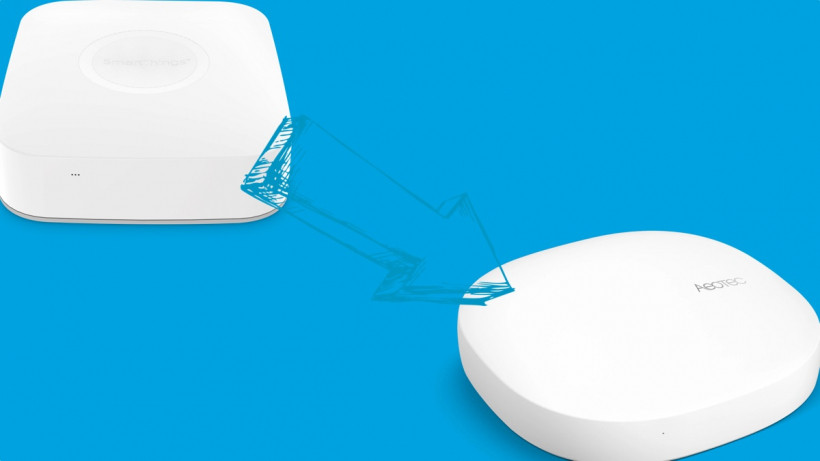
SmartThings is here to stay as an app and control system, but Samsung is moving away from making its own hardware, including the native hub. Instead, the Aeotec Smart Home Hub is the preferred SmartThings base for anyone that wants to directly connect Z-Wave and Zigbee devices.
If you’ve got an existing SmartThings Hub and want to move to the new Aeotec version, the process depends on the model you’ve got, as does the urgency.
If you have a SmartThings V1 Hub then, as of 30 June it will no longer work. V2 and V3 SmartThings Hubs will continue to work for now, so there’s less pressure on upgrading.
However, for maximum confidence and long-term support, existing V2 and V3 hub owners may be tempted to upgrade to Aeotec Smart Home Hub.
Here, we’ll take you through the steps to transfer devices from your old hub to the new one. Note that you only need to move Z-Wave or Zigbee devices that are directly connected to the hub; cloud integrations for other devices, such as Ring doorbells and Hue lights, and anything connected via Wi-Fi, such as Samsung home appliances, will continue to work and, in fact, don’t need a hub.
- Samsung SmartThings: Use the app, features and hubs for a better smart home
- The very best smart home hubs
How to transfer/migrate to the new Aeotec Smart Home SmartThings Hub
The transfer procedure works like this:
- SmartThings V1, ADT, SmartThings Link for Nvidia Shield and other Z-Wave/Zigbee hubs: You have to manually move your devices from one hub to another.
- SmartThings V2 and V3: You can apply to Samsung support to get the migration tool, which can move devices automatically for you. Be warned, Samsung says that this is a pre-production tool and it may not work properly.
In short, then, although there is the option for an automatic move for some people, you may need to do the job manually in many cases, as you can see from our experience with the Hub Migration Tool (below).
Install the Aeotec Smart Home Hub
First, you need to install the Aeotec Smart Home Hub, so that you have both the old and new hubs running on your system.
You can connect the new hub via Wi-Fi or Ethernet – the preferred method for reliability is Ethernet. In either case, plug your new hub in and plug in the Ethernet cable if you’re using it.
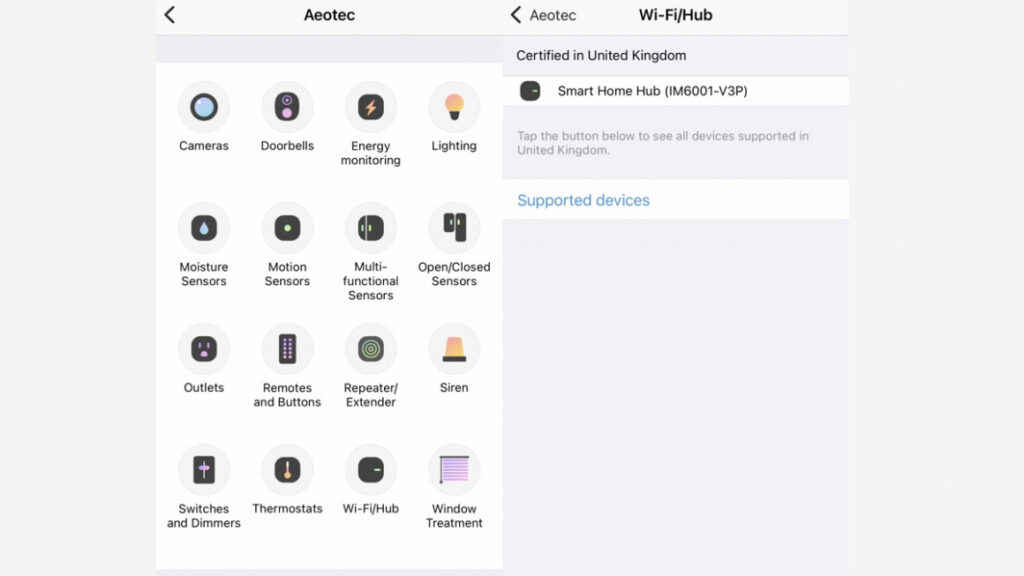
- In the SmartThings app Tap Devices then tap the ‘+’ icon and select Add device.
- Search for Aeotec and select that option from the list of manufacturers, then tap Wi-Fi/Hub.
- Select Smart Home Hub and then follow the wizard through to get the new hub connected.
- When you’re asked to name the hub it might be worth giving it a name, so you know it’s the new one: Aeotec Hub, for example.
Optional: Change the Zigbee channel
Aeotec warns that some older Zigbee devices may not work with the new hub unless you change the Zigbee channel used.
It recommends using channel 24, although you can also use channels 14, 15, 19 or 20.
However, it’s worth leaving this setting alone unless you’re having problems getting Zigbee devices to connect.
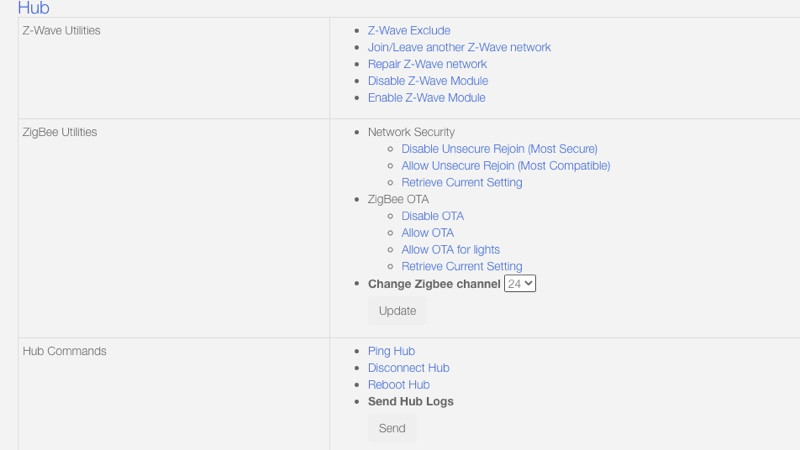
- To change the Zigbee channel, you need to log in to your SmartThings account online.
- Once in, click Hubs, select your new Aeotec Smart Home Hub and then scroll down to the bottom of the page and tap View Utilities.
- Change the Zigbee channel to 24 and click Update. It takes a couple of minutes for changes to take effect.
Manually transfer devices manually between hubs
If you have to manually transfer devices between hubs, then you have to do the job in two parts. First, you need to remove the device from your existing hub; then you need to add the device to the new hub.
We recommend leaving both hubs running for the duration, while you make sure that everything works.
To make matters worse, the process for removing devices differs depending on whether you’re dealing with Z-Wave or Zigbee devices.
Here’s what to do.
Remove Z-Wave devices from SmartThings
First, we’ll show you how to remove Z-Wave devices.
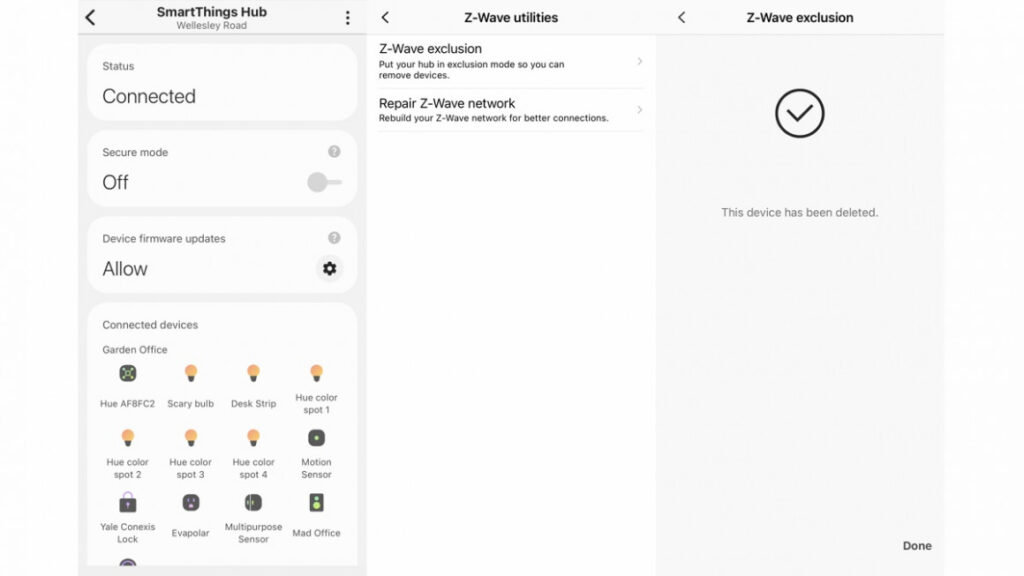
- Open up the SmartThings app and find your SmartThings Hub in the list of devices (make sure you have the old hub selected, not your new one).
- Tap your hub, then tap the three dots at the top-right of the screen and select Z-Wave Utilities.
- Then, select Z-Wave exclusion. This puts the Hub in the right mode to delete Z-Wave devices.
- You then need to go to the device that you want to remove and follow its reset procedure. You’ll most likely need to Google the device’s manual to find out how to do this: some devices have a reset button, others, like the Yale Conexis L1 smart lock, needed the R button on the back to be hit three times in rapid succession.
- Once a device has been removed, you should see a message on the screen that says ‘This device has been deleted’, and it will have been removed from SmartThings automatically.
- Tap Done, and hit Z-Wave exclusion again, then follow the steps above to remove more devices.
Remove Zigbee devices from SmartThings
To remove Zigbee devices, you should first remove them from SmartThings manually. Here’s how:
- Find the device that you want to remove, long-press it, select Edit and then hit Delete.
- The device will be gone from SmartThings but not yet ready to add to a new hub, as it needs to be factory reset.
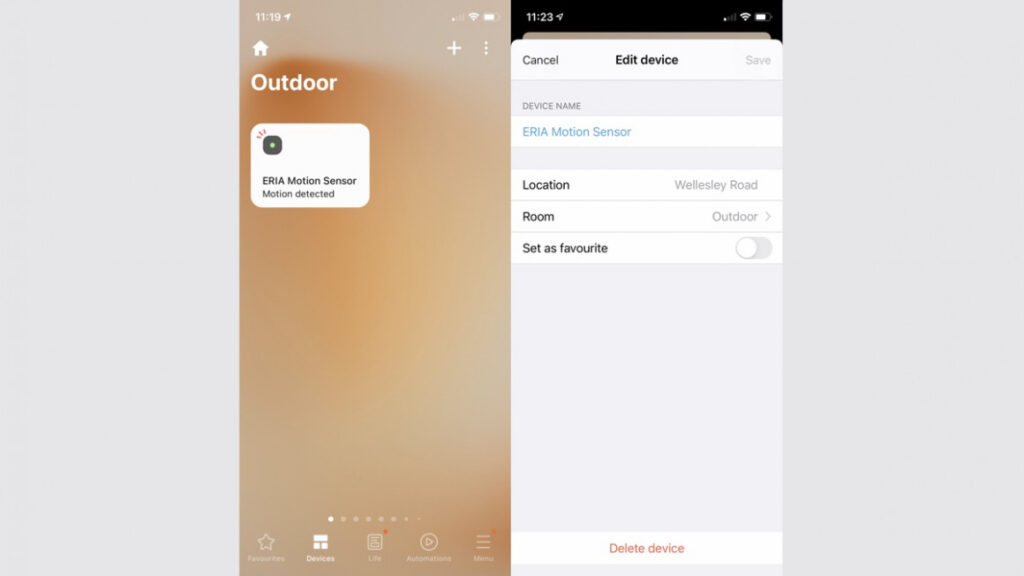
The procedure differs from device to device, so you’ll need to get your device’s manual to hand. Some devices, such as lights, may need turning on and off rapidly a set number of times; other devices may have a reset button.
Add devices to new Aeotec SmartThings Hub
Once you’ve removed your devices, you’re ready to add them again. To do this…
- Open the SmartThings app and tap Devices.
- Then tap the ‘+’ icon and tap Add device.
- You can then use the search button to find the device that you want to add.
Once selected, you’ll see a screen that lets you choose the Hub to add the device to and the room you want it in. Make sure that you’ve selected your new Aeotec Smart Home Hub and that you’ve chosen the correct room. - SmartThings should tell you what to do to get the device to work. With a Yale Conexis Lock, for example, it told me to tap the join button (Yale calls this the R button) three times.
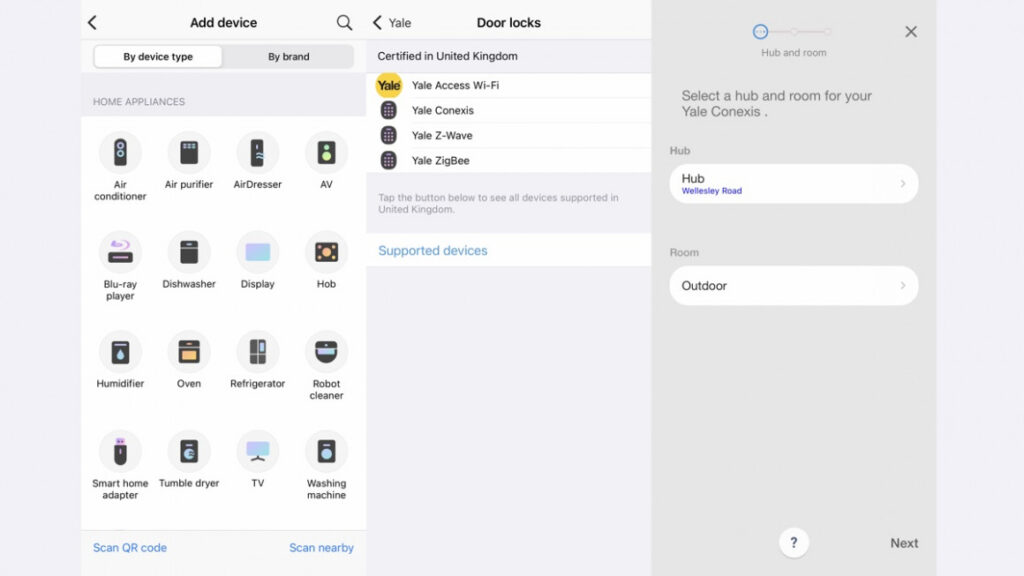
You may run into problems: SmartThings told us to scan the QR code, and then said it couldn’t verify this. Instead, we selected the option to enter the PIN, then entered the characters on the lock underlined, and this did work.
If you’re having real problems, then you may need to fully reset your Z-Wave devices following the manufacturer’s instructions.
With Zigbee devices you may need to put them back in pairing mode by following the manual: there’s often a pin-push button you need to hit.
Sometimes it’s best to remove the batteries for 10 seconds, then reinsert and try again. Repeat for all devices that you need to re-add until you’ve got everything back in the system.
Using the Hub Migration Tool
Samsung has built a hub migration tool that’s designed to move all smart home devices from a SmartThings V2 or V3 hub to the new Aeotec one.
Before we get into how this works, be aware that using this tool will erase all details on your original Hub. It will also wipe out any devices that you’ve connected to the new hub, so don’t attach anything to the new system until you’ve completed migration.
It’s also worth noting that Samsung says that this tool is currently in development and may not fully work. That was certainly the case for us and, on reflection, we’d rather have done the manual migration.
Still, for completeness here’s what you need to do.
Get access to the tool
To get access to the tool, you first need to email support@smartthings.com and give your account email address, the ID of the hub you want to migrate from and the ID of the hub you want to migrate to.
To get this information, you need to log into the backend of your SmartThings account.
Once you’re logged in click on the My Hubs link and note down the IDs of your two hubs.
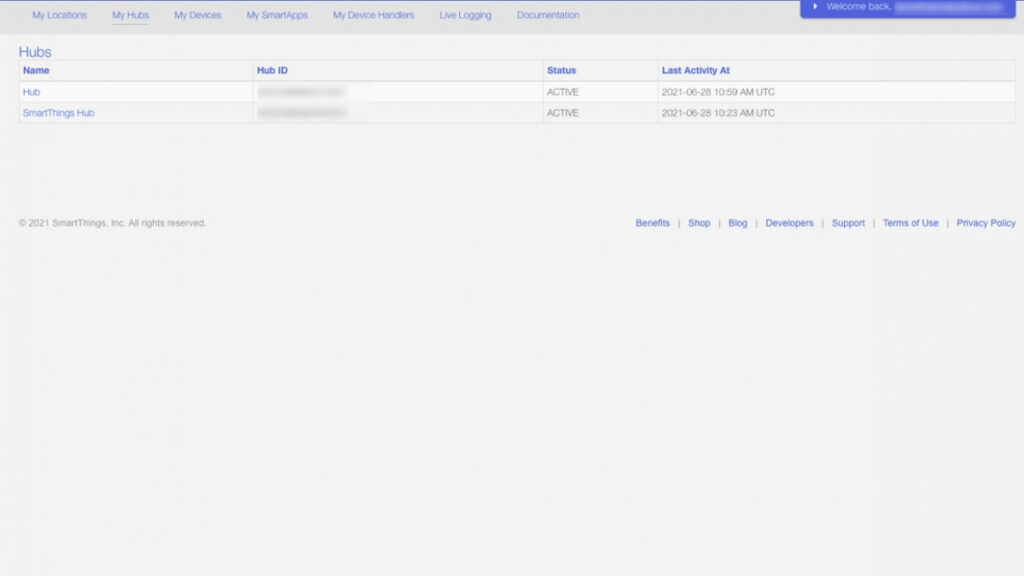
You’ll need to wait for SmartThings support to get in touch to enable the tool. This can take a few days and you’ll have to confirm a few more details first.
For us, when Samsung finally enabled the tool we couldn’t see it in my account. After a bit more help from SmartThings (the support team were excellent), we finally got access to the tool but I had to log into the web version of the interface at https://my.smartthings.com.
This then made the migration tool show up under the Automations section of the app.
Run the Hub Migration Tool
Once you’ve got the Hub Migration Tool, tap it to run it. You’ll first need to select the hub that you want to migrate from (the old one) and then choose the hub you want to migrate to (the new one), then tap Next.
Follow the wizard through to complete the process but only tap Next once on each screen – in many cases, it won’t look as though anything has happened but give it time, as the process is working in the background.
What the migration tool does is take a backup of your existing hub, including device connections. Once this is completed, it transfers the settings to your new hub and then the factory resets the old one.
That’s the theory, but in my case, the procedure was only partly successful and we got an error message about Zigbee backup failing.
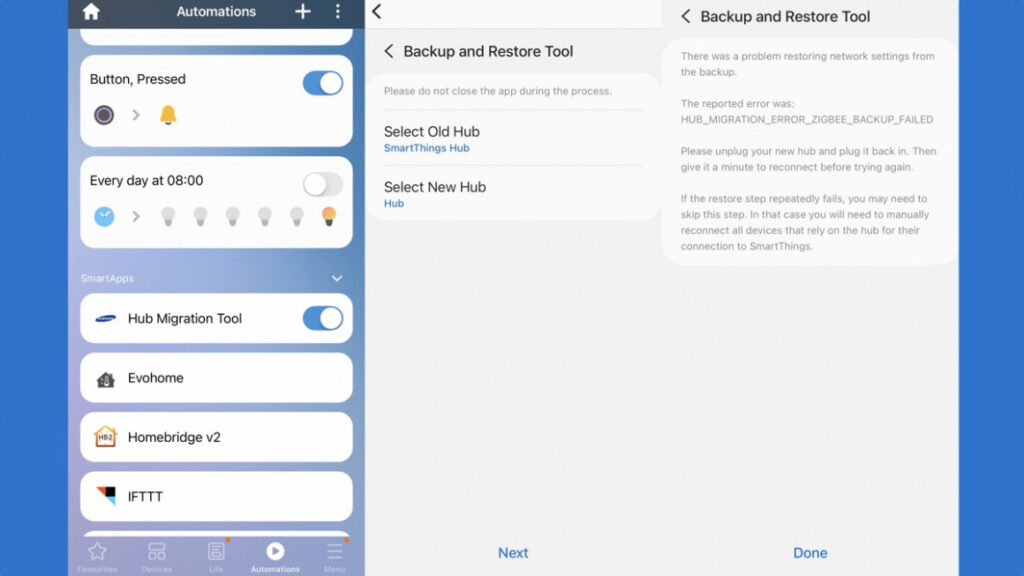
To complete the process you have to unplug the new hub and then reconnect it, and you can unplug and remove your old hub entirely.
When your new hub reboots it will take the name of your hold hub in SmartThings; the old hub will no longer show up in your account.
At this point, you need to do a little survey to see which devices migrated.
Our SmartThings sensors and Button did migrate; our Yale Keyless Connected Smart Lock did not transfer. This also meant that we lost some Automations: as with manually removing devices, if any device gets deleted, associated Automations are removed.
To get missing devices back we had to follow the manual reset instructions above to get them back. For Z-Wave devices, you can rest them by putting the Hub into Exclusion mode (instructions above).
Once your devices are back, you need to follow the instructions below to recreate your Automations.
Fix your SmartThings automations
One of the biggest problems you’ll have is that removing devices from SmartThings also deletes any Automations that you have.
That’s a real pain, as it means that you’ll need to recreate them to get your home automated again.
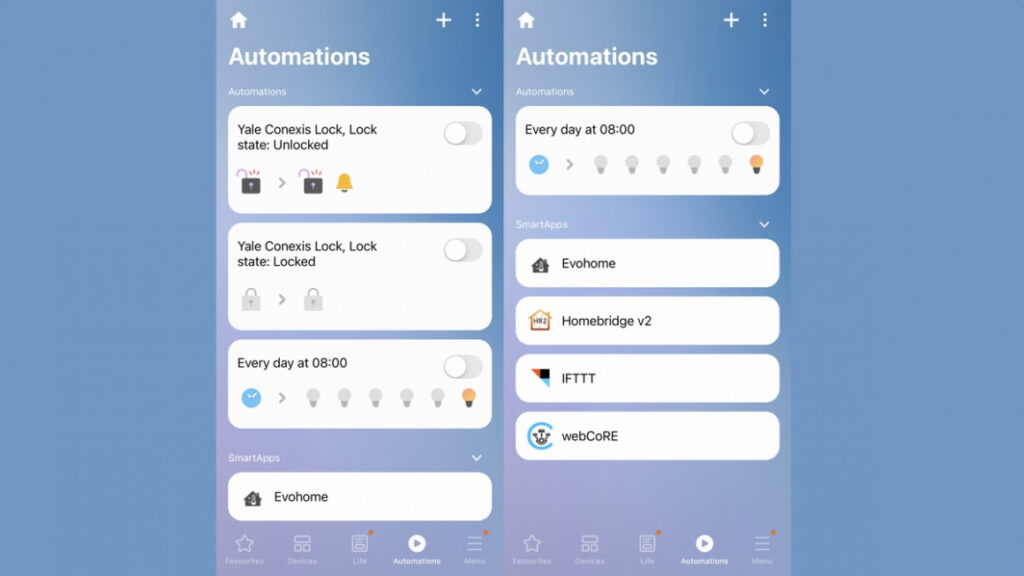
If you use any third-party software, such as HomeBridge, you may need to run through the setup procedure again to re-add any missing devices.
We had to go into the HomeBridge SmartThings Smart App and select the devices again, then restart the HomeBridge server.
It also meant that we had to recreate the HomeBridge Automations, too.
Likewise, we had to recreate our IFTTT smart home applets, as the device had technically changed; Google Assistant and Amazon Alexa also needed refreshing to rediscover the ‘new’ devices.


